Well parsnips are not the easiest vege to grow mainly because they can be difficult to get to germinate. There many different ways gardeners use to get a successful germination rate but really it simply depends on two main points;
- fresh seed - parsnip seeds lose viability very quickly, so fresh seeds are key.
- secondly is soil temp - 10 to 21 degrees Celsius being the best with early April onward being the most successful times for germination.
As I recieved my seeds via a swap and as such donot know how old the seeds are I have decided to try the chitting method which I will go into step by step. If in a couple of weeks there are no signs of germination I will try direct sowing to the soil by then it would be mid April and the soil temp should be consistently at optimum levels.
Chitting is a great way to check seeds for their viabilty and germination percentage. It is mainly done by putting some seeds on a damp paper towel or thin layer of soil and leaving in a warm place which should encourage quick germination. I have decided to go one further and make seed tapes with all the parsnip seeds placed at their sowing distances, so that once they have chitted I can simply plant out the seed tapes into the prepared soil and leave to grow on.


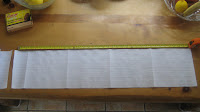
 3. I plan on having 3 rows, so I cut the towel into 6 pieces.
 4. On a tray I laid out three strips and placed the seeds at the desired sowing widths
 5. Then I wet each seed.
 6. A matching strip of paper was then laid over an existing strip of seed, whetted further and covered with a layer of clingfilm.
 7. One side of the tape sandwich was then folded back onto the clingfilm and more seeds were added.
Then step 5 was repeated.
 8. The dry strip was then relaid onto the seeded strip. Then steps 4 to 6 was repeated till all the paper towel strips were used up.
 9. When all the steps were completed the tray was covered with clingfilm to ensure the seeds remained moist.
 10. The tray was then left in a warm area, for me it was under a table next to a radiator.
Edited on the 03/ 04/09 to update on progress....
 11. The first chitted seed was noticed on Monday 30/03/09 this picture was taken of it on the 03/04/09 when there was many more chitted seeds.
No comments:
Post a Comment